 Personal
Branches
Product & Service Manuals
Add a New Recipient
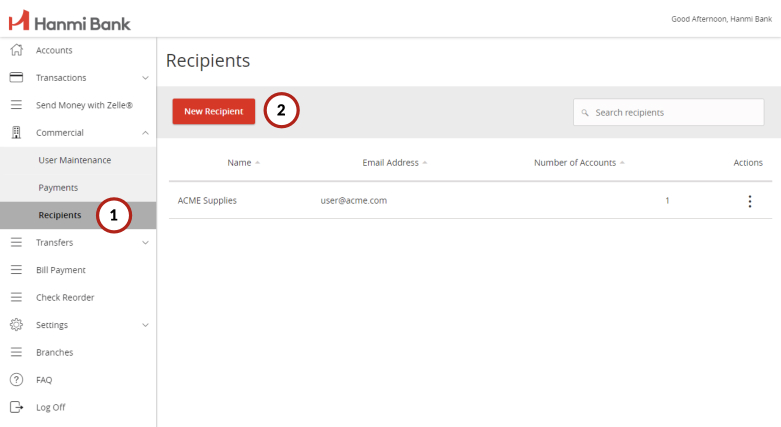
1: In the navigation menu, select Commercial -> Recipients
2: Click the New Recipient
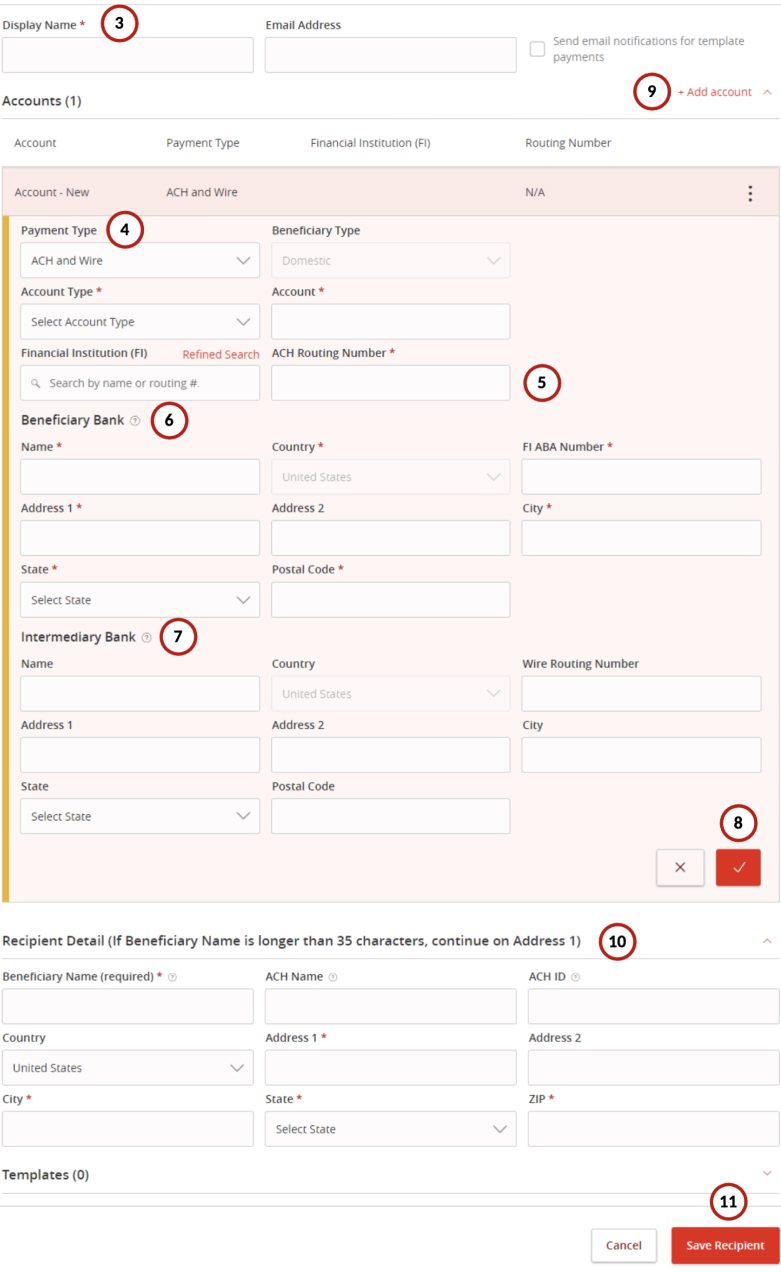
3: Enter the name of the recipient in the Display Name field (this is for display purpose only)
4: Payment Type indicates if you would like to use this recipient for ACH payments, wires, or both
5: ACH Routing Number is only for ACH payments
6: Beneficiary Bank information is only required if you plan to send a wire to the recipient
7: Intermediary Bank is required by some recipients when sending an international wire
8: After entering the recipient’s bank account information, click the red checkmark to finish
9: You may add multiple accounts for each recipient by clicking +Add Account
10: Enter the recipient’s name and address in the Receipient Detail section
11: When complete, click Save Recipien
Edit Recipient
Edit Recipient
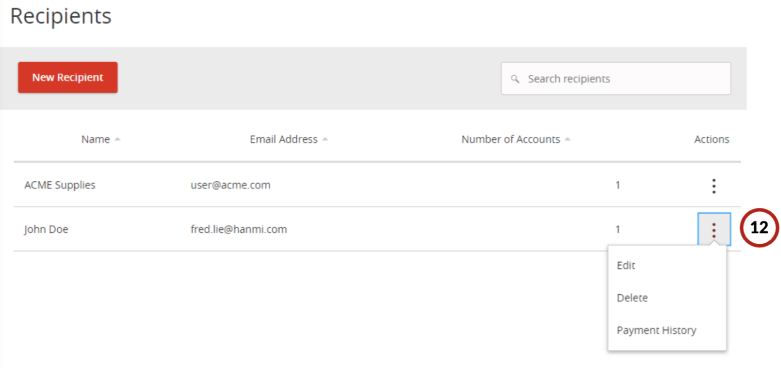
12: To edit a recipient, either click on the name or click on the three vertical dots under Actions Click on the field that needs to be edited

Click on the field that needs to be edited
13: Click Save Recipient to save all edits